-
Windows
Windows
-
French Doors
French Doors
-
Patio Doors
Patio Doors
-
Front Doors
Front Doors
-
Roller Shutters
Roller Shutters
-
Window Sills
Window Sills
-
Sign in
Contact us
You don't have to be a professional, or even consult one, to be able to remove a back door. Do-it-yourselfers or even amateurs can easily carry out this job themselves – provided, of course, that all the necessary tools and materials are available, otherwise the work will be delayed.
Detailed instructions explain the process of removing the door and list the accessories required to ensure a smooth door change.
Material list
Tool list
There are many reasons for having to remove a back door. It may be either damaged or no longer fits with the house's aesthetic and should therefore be replaced. Refreshing the colour – which is regularly the case with doors made from wood – is also a reason for an upgrade. Thorough preparations should be made to ensure a smooth process. First of all, you must have the right tools to hand.
A wall milling machine is certainly an advantage, but having one is not a requirement. Before starting work, furniture and the floor around the door area should be protected from dust using a protective sheet. If the back door is removed with the intention of replacing it with a new model, it is advisable to measure the door embrasure again to be on the safe side before the installation begins. The new door can only be installed if everything fits perfectly. There are also separate instructions for measuring doors.
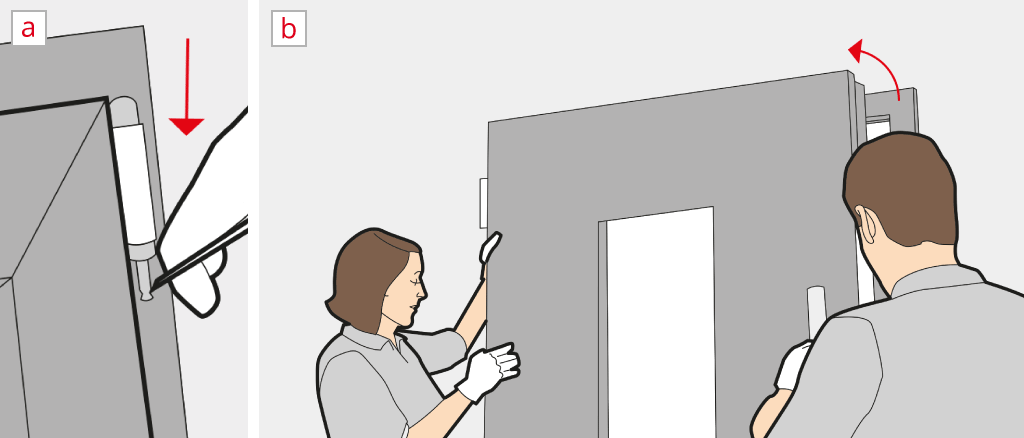
After all the preparations have been made, the actual removal can begin.
The frame for the back door is a bit more complicated to remove than the door leaf, because it is firmly attached to the masonry. This is the only way for a door to be able to withstand daily use and provide the necessary security. The fixed connection is unfastened as follows:
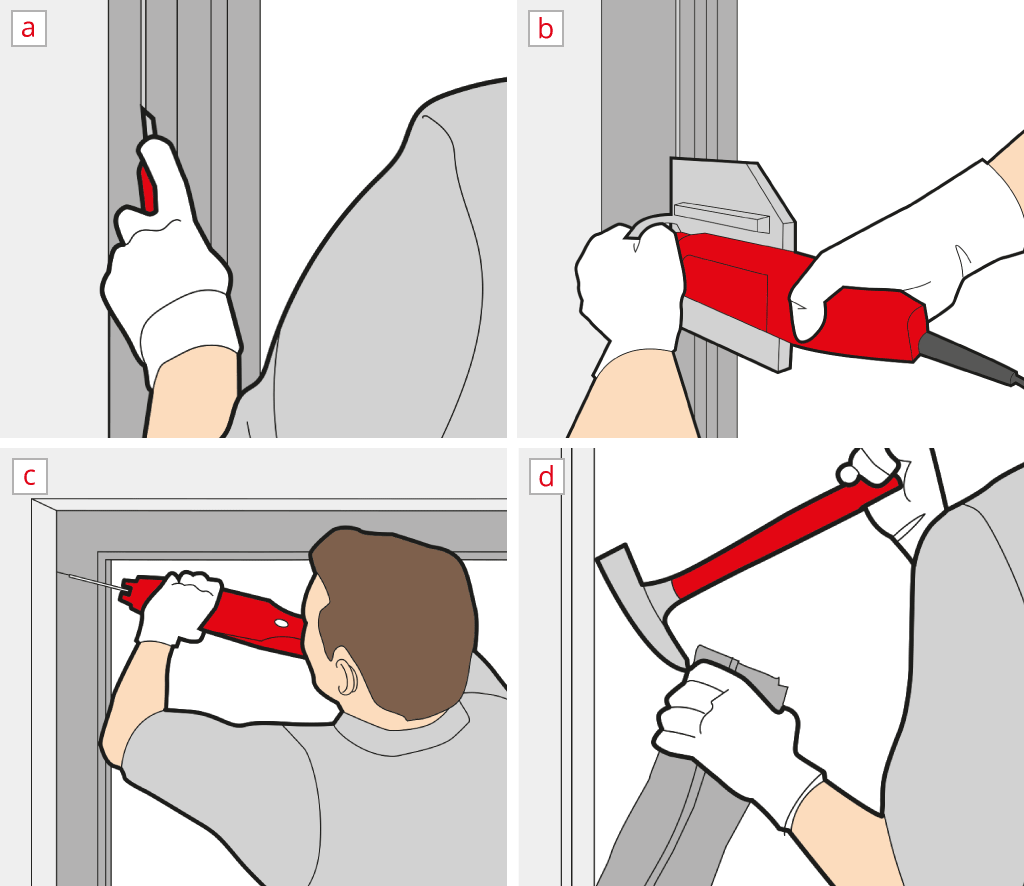
To do this, saw directly along the frame either using an electric foxtail saw or a wall milling machine. On some doors, the wall anchors are also visible or can at least be guessed at – here precise work when removing is possible directly at the corresponding point on the back door, which saves a lot of time (Fig. 2a and Fig. 2 B).
Once the wall anchors have been loosened, the frame itself is cut into pieces before final removal. For this purpose, a cut is made with the saw at the top and bottom: the door frame is cut twice on the left and right. These cuts should be made in a V-shape, as this will ensure that the individual pieces do not become wedged when levered out (Fig. 2c).
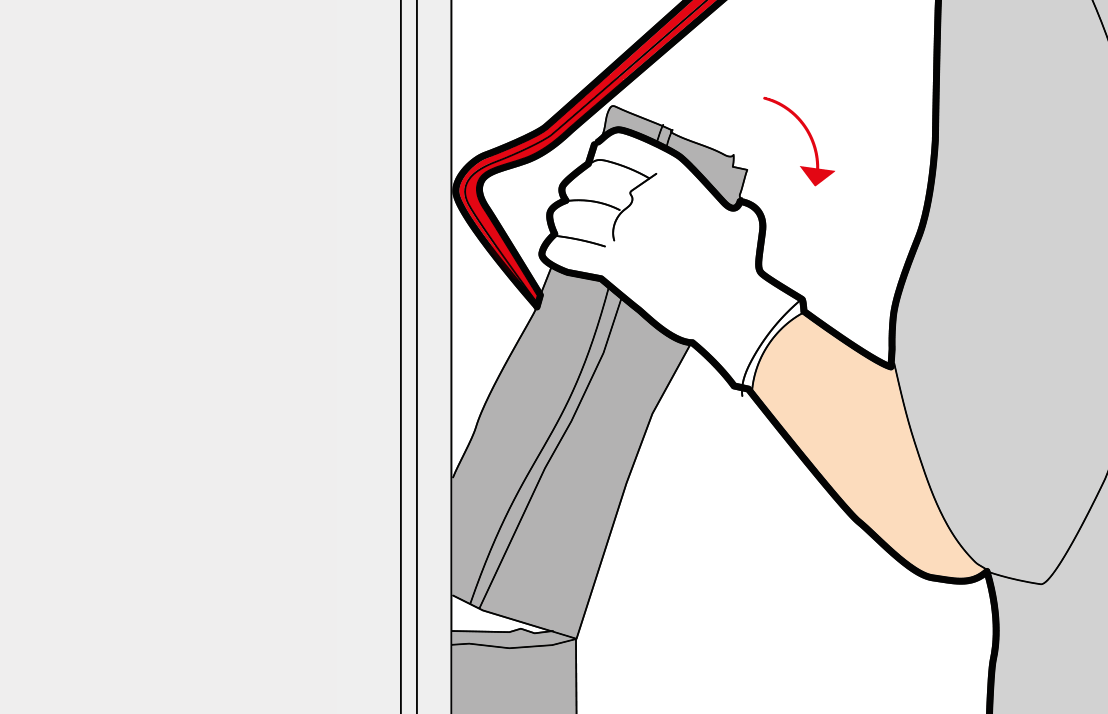
The loosened and sawn up pieces of the door frame can be removed as the final removal step. To do this, the crowbar is placed in the gap between the masonry and the door frame. If individual pieces of the frame cannot be detached without a great deal of force, the saw must be used again in order to be able to completely remove the door frame (Fig. 2d).
With careful preparation and the appropriate tools, removing a back door is almost child's play, even for do-it-yourselfers or amateurs – especially if a second person can help with the work. It is therefore not necessary to hire an expensive specialist to remove the old door and install a new one.